
After hosting our very first Thanksgiving this year, I have been really excited to host more gatherings.
My family always made gingerbread houses growing up and we didn’t skimp. Hundreds of dollars worth of candy, homemade gingerbread wafting through the air– the whole sha-bang.
Although ours was going to be a bit more low-key, I still thought it would be a great way to do something that I love AND give to others this season by providing a fun atmosphere. Everyone loves to be invited to things– right?
Here is what you would need to host one of your own:
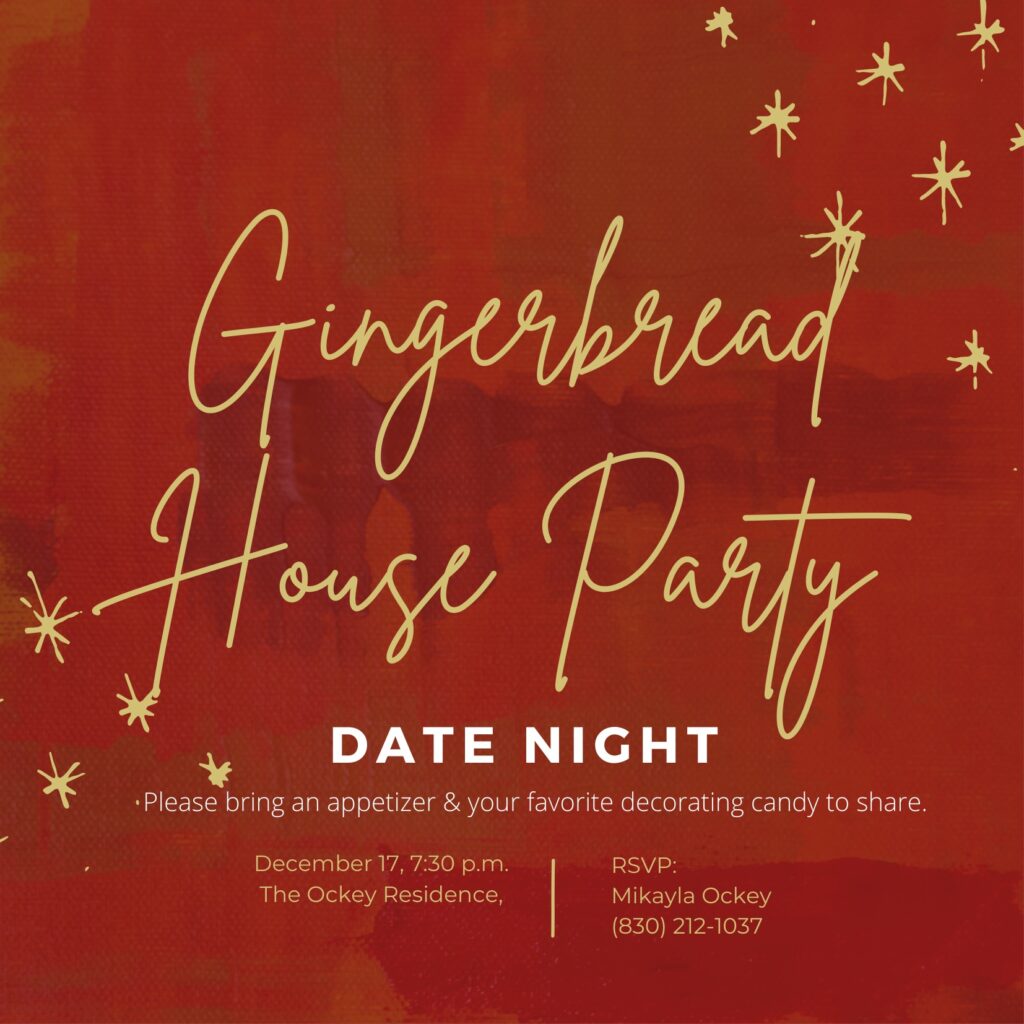
- Invitations: I always think it feels a bit more official when you get a real invitation. I made ours on Canva using one of the free templates and love the way it turned out! You can either send it via text, email, or print them at a print shop and mail them.
Here is a picture of how ours turned out!
2. Purchase Supplies:
–Gingerbread Houses: Once everyone responds to your RSVP, then you will know how many houses to make (or buy) and how much candy to expect. I am not quite brave enough to make them all from scratch yet and I wanted it to be a step up from graham crackers so I bought the A-frame house kits from Trader Joes for about $7/couple. Here is the link if you want to see what it looked like but don’t buy it off Amazon, unless you want to pay a small fortune.
-Cake Boards: My family always bought cake boards to build the houses on that were quite a bit bigger than the gingerbread house so you can add a little picket fence, garden and such (my favorite part) so that was a must for me. I picked some up at Walmart that came out to be $1 a house.
–Frosting: The kits come with frosting but if you are making them you will need to buy (or make) Royal Icing. This is the secret to a sturdy gingerbread house and provides much less frustration than jarred frosting.
–Piping Bags and Tips: It is great if each person can have one but even if you only have a couple, people can share. Our kits came with these as well!
–Candy: The main thing is to go for variety here. I ended up getting pull-a-part twizzlers, M&Ms, candy wreaths, mini chocolate bars, M&Ms. I also used non candy items like pretzels, coconut, graham crackers, crackers, etc. The sky is the limit here! Set a budget and then GET CREATIVE. The kit comes with some candy, which we will use as well, but it is pretty minimal. I also asked everyone to bring their favorite candy so we could have some more variety!
–Snacks: Our party was in the evening so we didn’t need too many snacks but I made a few simple things (chips and salsa, cheese and crackers, popcorn, veggies etc.) and then asked everyone to bring something to share.
3. Set Up:
- Set out your appetizers/ snacks: I usually start with this part because it is the easiest.
- Tablecloth: You can use a plastic disposable one or you can use Kraft paper (we use Kraft Paper) but you are going to want some sort of barrier for your table. Things get messy!
- Assemble houses: You can either set each house unassembled on the cake board or assemble them yourself but you will want to have each station set up before they get here with a board, house and frosting tube so they are ready to go! **NOTE: If you assemble them before, you may want to do that the night before if you are hosting a big group.
- Put candy in bowls: This makes it much easier to see what is available!
- Add a little decor: You don’t want to do anything crazy because you want to have room for the candy but I plan to use some bottle brush trees (similar) to spice it up a bit.
- Add some Christmas music, turn on your Christmas tree and you are ready for the fun to begin!
All in all, we spent $48 for 4 houses, candy and decor which came under our budget of $50 for the party!

Let’s Talk about Finances!
Let’s talk about your current financial situation, and where you want to be.